ULab Help - adding a laboratory & its equipment
The laboratory is a representation of your actual lab, to which you add equipment and furniture. If you are not the main contact/ owner or PI for the lab, check that the lab has not already been created on the system - you can use the search tool to see if it is listed already.
To add a lab
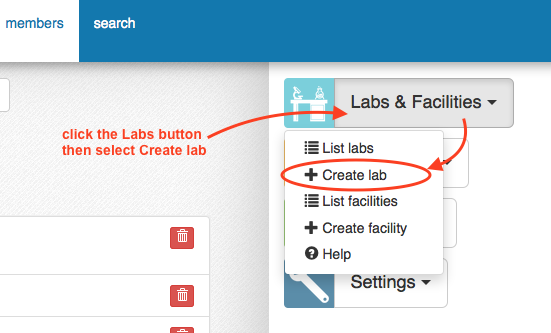
- from the members page, click on the "Labs & Facilities" button
- select the Create lab option
You will be shown the lab details form:

- complete this with the required details.
- the owner and any editors can manage the lab and its equipment
- the contact will be listed in addition to the owner on any searches
- you can choose to upload a floorplan image (gif, jpg or png format) or you can draw a plan in the floorplan editor later on.
- click the add lab button to add your lab
the empty lab will be created.
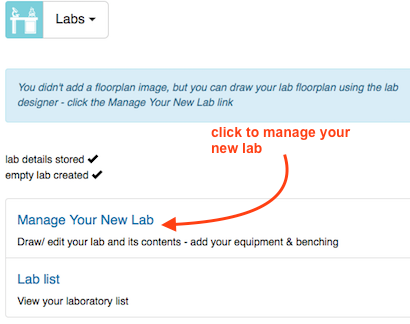
Select the 'Manage your new lab' option - this will allow you to continue to the lab floorplan designer screen where you can add equipment, furniture and to draw the floorplan if you didn't upload a floorplan image in the previous step.
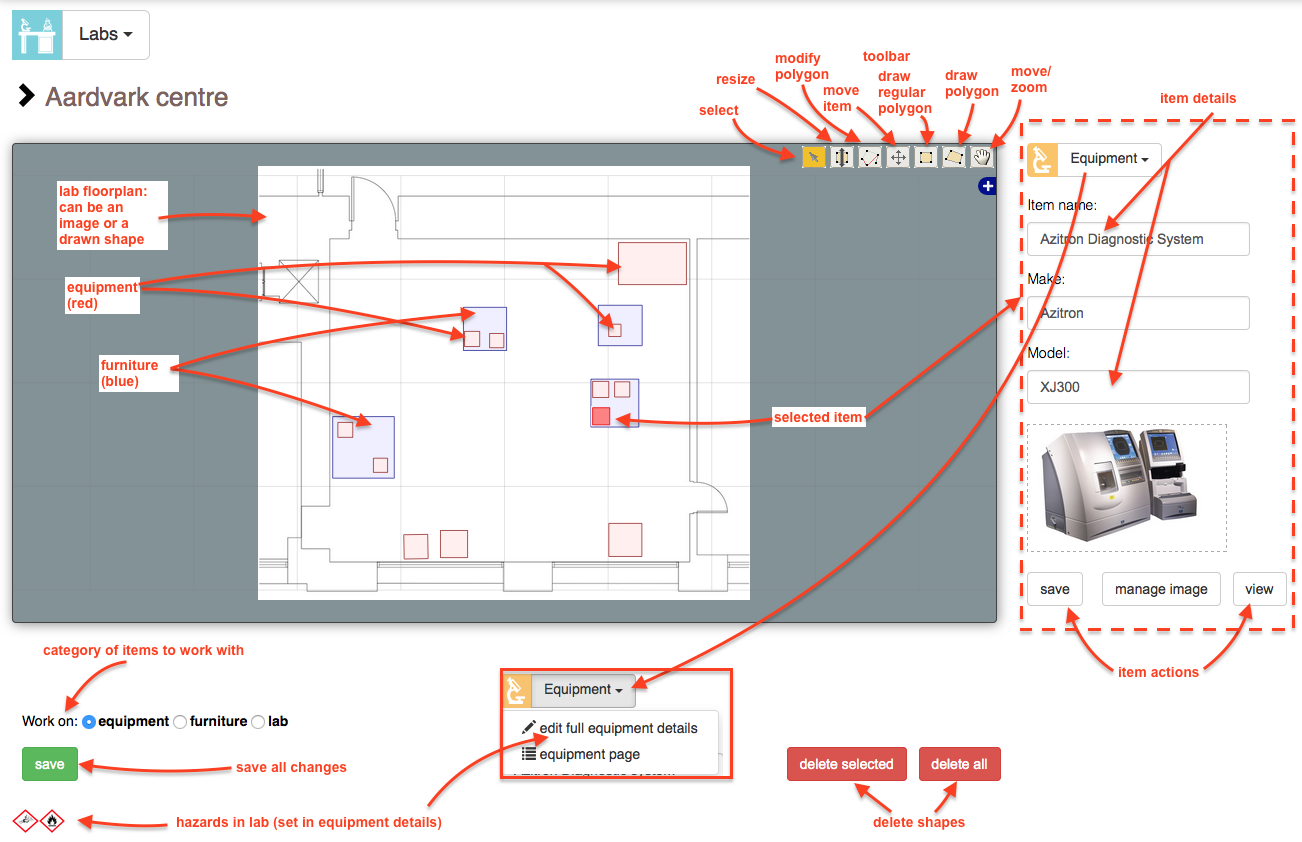
Floorplan designer
the floorplan designer is used to map out your lab, its furniture and to add basic equipment details
Draw the lab floorplan
If you didn't choose to upload a floorplan image, you can draw it in the lab floorplan designer:
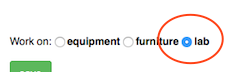
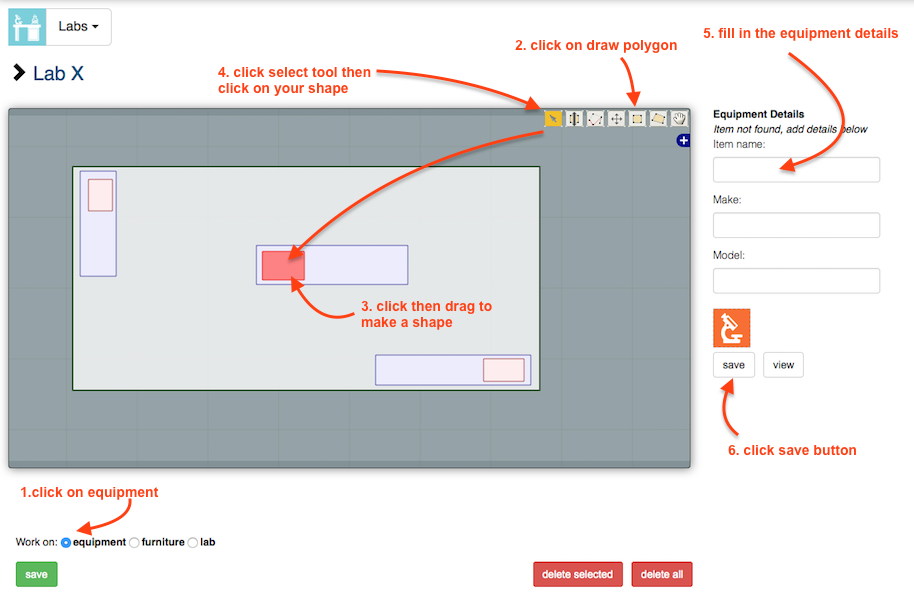
- click the 'lab' option in the "work on" radion buttons under the lab editor
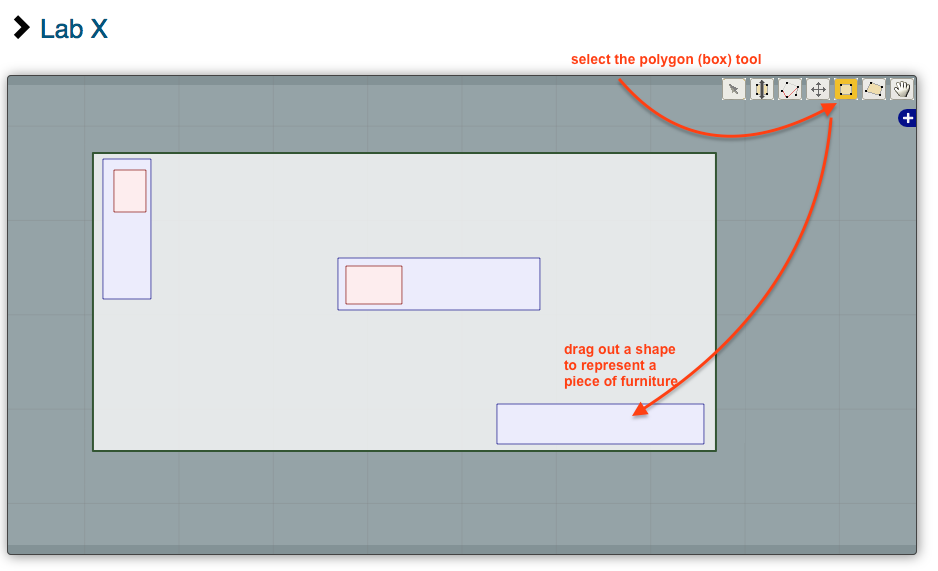
- click the polygon (box) icon in the lab editor toolbar
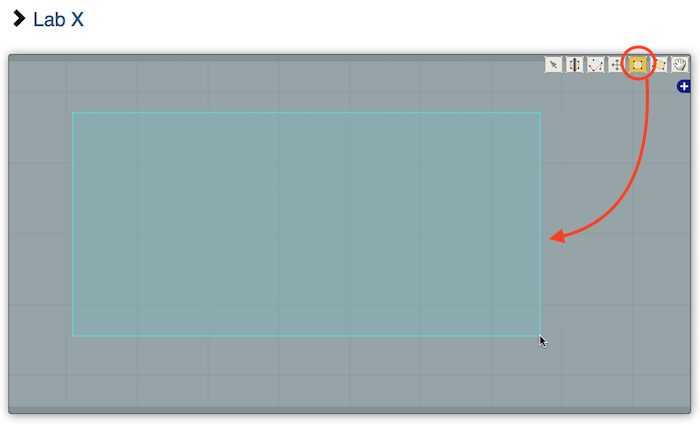
- drag out a shape to represent your lab
- click the save button
Lab items are outlined in dark green. Once you have created the lab, you can add the furniture and equipment.
To add equipment
Each item of equipment in your lab has to be represented by a 'box' on the floorplan. To add a piece of equipment:
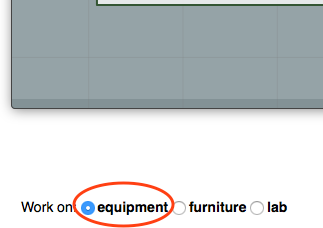
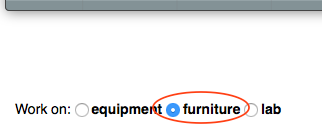
- check the 'work on:' radio button is set to equipment
- click on the draw polygon (box) icon in the editor toolbar
- drag out a shape to represent your equipment
- click the select tool then click on your shape
- the equipment details form will appear to the right of the designer window
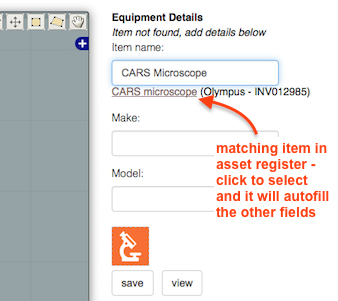
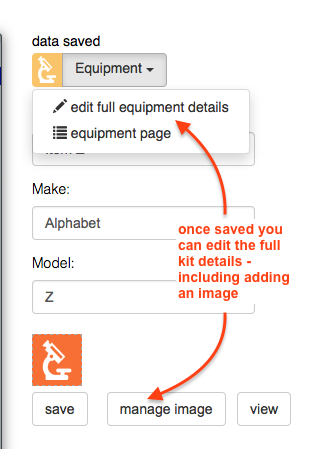
- enter the item name - this will begin to match items in the central asset register. If your equipment is listed, select the item that appears and the data will be filled in for you. If your item is not listed, continue to type and complete the Make and Model fields.
- click the save button
repeat this process for each item you want to list in your lab. Equipment items are outlined in red.
Once you have added an equipment item, the equipment details panel on the right will update to allow you to access the full details you can store on each equipment item, such as setting up booking options and adding an image.
To add furniture
adding furniture (desks, benching, cupboards) is very similar to adding equipment, the main difference being that furniture have more limited meta data associated with them. Furniture items are outlined in blue.
- click the Work on: furniture radio button
- click on the polygon (box) tool in the editor toolbar
- drag out a shape to represent your furniture item (bench, desk etc).
- click the select tool then click on your shape
- the equipment details form will appear to the right of the designer window
- complete the name field and then click save to store the furniture item